tags:
- linuxPlease note this is by no means an exhaustive list. Security principles and processes are different for various distributions & environments. Be sure the check the Other Security Resources linked at the bottom of this page.
General Security Considerations
- Root user is all powerful.
- Follow a process for removing user accounts.
- root has full control over all system processes.
- Use a firewall (ufw, iptables, dedicated firewall).
- Use Multi-Factor Authentication wherever possible.
- NEVER give root access to a user that does not absolutely require it.
- File permissions make it easy to manage what each user has access too.
- Linux is less popular than windows 🙂, and it is open source, so less malware is developed for it.
- Root is required to install system-wide software, configure networking, & manage users, along with other administrative tasks.
- Only allow network connections from required sources (for example, only allow incoming traffic from SSH if no other applications require network connectivity).
- Centralized package managers can certify applications are malware free before they are installed.Package managers also allow users to update all of their software at once.
- Encrypt all data transmissions over a network. Ensure you are are using the latest versions of protocols to make sure data is encrypted properly. for example, sftp instead of ftp.
- linux allows you to create dedicated accounts for services & applications.This way, if a service or process becomes compromised, it is less likely to affect the rest of the system.
- Individuals should always have their own system accounts. Users sharing accounts can make it difficult to find the source of a breach. Users have a bad habit of being less responsible with shared user accounts.
- Monitor system activity. This means regularly reviewing system logs. Sending logs to a dedicated server can help managing the review process easier, and also means you have a duplicate of logs in case an attacker changes logs on a system.
- Avoid direct logins to root and service accounts unless absolutely neccessary. Users should log in to their personal accounts then use 'sudo -u' to run commands as other users. This creates a log trail that does not exist if users sign in the application, service, or root accounts.
- Wherever possible, run applications and services in their own system (container, VM, dedicated physcial hardware).Otherwise, ensure applications and services have their own dedicated user. This way, if an application or service becomes compromised, it is less likely that it will be able to effect the rest of the system.
Physical Security
- Ensure that single user mode is either disabled or password protected. Single user mode can be accessed by restarting the system, and provides root access to the system.
- Require a boot menu password. Without a boot menu password, attacks can force the bootloader to boot a root shell instead of another aprt of the operating system, providing them with root access. To do so, follow these steps:
- Open a terminal.
- Run the command
grub-mkpasswd-pbkdf2. You'll be asked to enter the password and then to confirm it. This will create an encrypted password for the bootloader. - The command will output a hashed version of the provided password. Copy this.
- Open the GRUB configuration file with root permissions using a text editor. For example, if you're using vim, you would enter:
sudo vim /etc/default/grub - Find the line that starts with
GRUB_PASSWORD. If it doesn't exist, you'll need to add it. You can edit the file by entering insert mode in vim simply by inputtingi. To exit vim without making changes, hit escape, then enter:q!and press enter. Set GRUB_PASSWORD to the hashed password you copied. It should look like this:GRUB_PASSWORD=grub.pbkdf2.sha512. 10000.long_string_of_characters - Save the file and exit the text editor. If you're using vim, you can do this by pressing
escape, then entering:wqto confirm that you want to save the changes, and thenEnterto confirm the file name. - Update GRUB with the new configuration by running:
sudo update-grub
-
Ensure device encryption is enabled. Requiring a boot password can be circumvented by an attack installing their own boot media and mounting the system. LUKS is a common encryption tool.
-
For example, if you are hosting a web server in a cloud instance, ensure the cloud instance is encrypted. additionally, you can run the server in a VM, and make sure the virtual drive for the VM is encrypted.
-
LUKS is a common encryption tool. It can be used to encrypt any block device.
-
Disable CTRL+ALT+DEL. CTRL+ALT+DEL initiates a system reboot. if an attacker is able to gain access to the system they may use the restart to gain access to the bootloader.
-
CTRL+ALT+DEL can be disabled by running
sudo systemctl mask ctrl-alt-del.target sudo systemctl stop ctrl-alt-del.target
Account Security
-
Root user always has a user ID of 0.
-
Assigning a User an ID of 0 will grant them root privileges.
-
Accounts for system services should have UID's of less than 1,000.
-
New users in the standard user range can be created using
useradd -
New users can be created in the system services account range using
useradd -r -
authentication logs can be viewed by running the
lastcommand.lastbwill show failed login attempts. -
The
lastcommand logs are found in/var/log/wtemp -
logs for
lastbare stored in/var/log/btemp -
Other authentication logs can be found in the messages, syslog, secure, and auth.log files in the
/var/log/directory. -
Sometimes you may want to lock a user account. Maybe the account is compromised, a user no longer needs access, or it is a dedicated account for a service or application. Here are a few ways you can disable logins:
-
Changing the final entry in a users line of the
/etc/passwdfile to nologin (default is /bin/bash) -
This can also be done by using the change shell command like this:
chsh -s shell account -
For example,
chsh -s /sbin/nologin foowould disable logins for the user foo. -
to re-enable logins, you would run
chsh -s /bin/bash foo -
Another way to lock an account is with the passwd command, although this only prevents the user from logging in using a password. For example, a user would still be able to log in using an SSH key.
-
To lock an account:
passwd -l foo -
To un-lock that account:
passwd -u foo -
PAM, or pluggable Authentication Module
-
PAM allows applications to use any authentication method (ie, fingerprint, yubikey, etc).
-
PAM modules exist for google authenticator and other Multi-Factor Authentication services.
-
PAM can be used for authentication for any application that supports it.
-
PAM files are stored in /etc/pam.d
-
Account password requirements can be set in
/etc/pam.d/common-passwordon Ubuntu/Debian systems or/etc/pam.d/system-authon Red Hat systems. -
PAM can also be used to prevent non-root users from logging in.
-
By adding
auth required pam_nologin.soto the top of/etc/pam.d/loginor/etc/pam.d/SSHdfile you can easily prevent system wide logins via those methods. -
After adding
auth required pam_nologinto either file, a file namednologinmust be created in the/etc/directory. If a user attempts to log in, the contents of that file will be displayed to them. -
To re-enable logins, simply delete the
/etc/nologinfile. -
Users will still be able to SSH into accounts by using SSH keys if the UsePAM setting in the SSH server's configuration file (
/etc/ssh/sshd_config) is set to 'no'. -
Account & password expiration dates can be configured in
/etc/login.defs -
pass_MIN_LENsets minimum password length -
pass_WARN_AGEnumber of days warning before a password expires -
Use Shadow passwords.
-
Encrypted Passwords are typically stored in
/etc/passwd, but can be viewed by all users. This means that attackers can simply copy the encrypted passwords and take their time cracking them. -
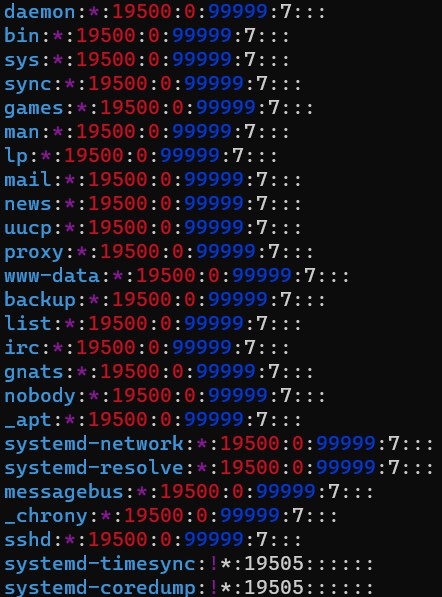
With shadow passwords,
/etc/passwdonly shows an 'x' as the users password. Instead, encrypted user passwords are stored in/etc/shadow, which can only be accessed by root. -
shadow passwords can be enabled using
pwconvas root. -
Shadow password format:
-
username:hashed password: days since epoch of last password change: days until user is allowed to change password: days before a password change is required: days warning before password expiry: days before account becomes inactive: days since epoch when account expires: reserved -
Screenshot of the /etc/shadow file from a debian VM:

-
chage: change user password expiry information. -
chage -l account:list account aging information. -
chage -M Max_Days: Set the max number of days during which a password is valid. -
chage -E Epire_Date: date on which the account will no longer be accessible in yyy/mm/dd format. Use -1 to 'un-expire' an account. -
chage -d 0: will force a user to change their password the next time they try to sign in. -
Centralized Authentication
-
Centralized authentication systems allow administrators to prevent accounts from performing any actions, including logging in if they become compromised.
-
If an attack gains control of your centralized authentication system, they control the device.
-
Common centralized authentication systems are freeIPA and LDAP.
-
Intrusion prevention
-
Intrusion prevention systems, such as fail2ban , monitor system log files. If too many failed login attempts are detected, their IP will be blocked.
-
fail2ban can be configured to unblock IP addresses after a set period of time, so if the "attacker" turns out to be a normal user that forgot their password, they will be able to regain access to the system.
-
fail2ban can be used for any application that writes login attempts to a log file. This includes SSH and many other common applications.
-
Disabling root logins
-
To display all accounts with UID of 0 (root access), run
awk -F: '$3 == 0 {print $1}' /etc/passwd -
This command works by using awk, which is a text processing command. The -F: option tells awk to use a colon as the field separator, as fields in the /etc/passwd file are separated by colons. The $3 == 0 part is a condition that checks if the third field (which is the UID) is 0. If this condition is true, awk executes the action in the curly braces, which is to print the first field (the username).
-
Any accounts with a UID of 0 should either be assigned a different UID or be removed.
-
/etc/securetty -
This is a config file that contains a list of TTY devices where root is allowed to login. Leaving it blank will prevent root logins.
-
TTY devices are 'local' terminal/console devices. Leaving a blank securetty file will not prevent remote console sessions, such as SSH.
-
Set the root account shell to nologin. This can be done by modifying the /etc/passwd file, or ideally with the chsh command.
-
Use
passwd /l rootto lock the root account password. -
To prevent root logins via ssh, add
PermitRootLogin noto the/etc/ssh/sshd_configfile. -
you can prevent other users from accessing the system via SSH by adding
DenyUsers account_namesto the same file. -
Run
systemctl reload sshd -
Securing System / Application Accounts
-
Use 1 account per service. For example, if you are running an nginx web server, run that server as its own nginx user.
-
Do not allow direct logins to system or application accounts.
-
Use
sudo -uto run commands as an application account. -
Deleting Accounts
-
When an account is no longer needed, use
userdel -r UIDto delete the account. -r specifies to delete that users home directory. -
Use
id account_nameto find an accounts UID. -
After deleting a user account, you can find leftover files that belonged to that user by running
find / -UIDandfind / -nouser
Network Security
-
Network Services (typically referred to as servers, or daemons)
-
Servers & daemons constantly run and the background & listen on network ports.
-
Because their output is continuous, it is typically stored in log files. Most applications will store their logs in the /var/logs directory.
-
Daemons and servers are typically designed with a single task in mind (hosting a website, handling SSH, etc)
-
Use a dedicated user for each application.
-
This way, if an attacker gains control over a system, they should not be able to access the rest of the system.
-
ports below 1024 require root privileges to open. If an application must use one of these ports, use root privileges to open the port, then drop the privileges.
-
if a server is running on a low port, check the application configuration to see if you can specify a non-root user to perform the work.
-
Stop & uninstall all unused services.
-
Ensure all applications are up to date with the latest security patches.
-
Configure each service to only listen to required interfaces and addresses.
-
For example, configure SSH to only listen to private IP addresses on the local network so that SSH is not accessable via the internet.
-
some services, such as databases, may not need any access by network devices. In this case, configure the service to listen to the "loopback" adress: 127.0.0.1
Securing SSH
-
Key based authentication is generally the safest way to use SSH
-
Key based authentication can be enabled by adding
PubKeyAuthentication yesto the/etc/ssh/sshd_configfile. -
To generate an SSH key, run
ssh-keygen -
When generating a key, it is common to use
ssh-keygen -tto specify what algorithm to use when generating the key. -
Common algorithm options are rsa and ed25519
-
Another common option when generating a key is
ssh-keygen -bwhich is used to specify the number of bits in the key. -
A longer key means it is better protected against brute force attacks, but it also means it is more compute heavy to generate and validate.
-
The typical length is 4096
-
The command should look something like
ssh-keygen -t ed25519 -b 4096 -
When you generate an ssh key, it will ask you to input a password that will be required when that key is used.
-
In some usecases, you may not want to have a password protected key. For example, if you need to automate an SSH connection, it may be unnecessarily complicated to automate password entry.
-
When you run ssh-keygen, two files are created in that users
~/.ssh/directory. Those files are id_rsa & id_rsa.pub -
id_rsa is your private SSH key. Its permissions should be set so that only the user that generated it can access it.
-
id_rsa.pub is your public SSH key. This will be placed in the remote hosts ~/.ssh/authorized-keys file to grant SSH access to that user.
-
you can add a key to a remote host by running
ssh-copy-id user@host -
For example
ssh-copy-id username@1.1.1.1orssh-copy-id username@mydomain.com -
SSH key authentication can be enforced by disabling password authentication by adding
PasswordAuthentication noto the/etc/ssh/sshd_configfile. -
Disabling password authentication to SSH is generally good practice as SSH keys are effectively impossible to brute force.
-
You should never log in directly to the root user.
-
When setting up a remote host initially it is OK to log in as the root user to get other accounts set up, but then SSH access should quickly be disabled.
-
To prevent root logins via ssh, add
PermitRootLogin noto the/etc/ssh/sshd_configfile. -
If you need acccess the root user, you should do so by SSHing into your personal user, and then switching to the root user using
sudo su - -
sshd_config
-
Specific users can be granted SSH access by adding
AllowUsers username0 username1 username 2 -
The same can be done for groups
AllowGroups group0 group1 group2 -
Groups & users can be denied SSH access by adding
DenyUsersorDenyGroups -
The SSH banner should be disabled by adding
Banner noneas the information it provides may be used by attackers. -
Changes to sshd_config will not apply until the application has been reloaded.
-
This can generally be done by running
systemctl reload sshd